This beautiful doily is designed by Lucille LaFlamme. It took me six days to finish it; I hope that you like it.
Size: About 16" diameter
Materials:
Bedspread-weight crochet cotton, one (225 yd ball) ecru
Size 7 steel crochet hook, or size required for gauge
Gauge:
Rnds 1 through 5= 3 1/4" diameter
Pattern Stitches
Cluster(CL): Keeping last lp of each dc on hook, 2 dc in next lp or in next 2 sts; YO and draw through all 3 lps on hook: CL made.
Beg 4-dc Cluster (beg 4-dc CL): Ch 3, keeping last lp of each dc on hook, dc in next 3 sts, YO and draw thorugh all 4 lps on hook: beg 4-dc CL made.
4-dc CLuster (4-dc CL): Keeping last lp of each dc on hook, dc in next 4 sts, YO and draw through all 5 lps on hook:
4-dc CL made.
Instructions
Ch 9, join to form a ring.
Rnd 1: Ch 3 (counts as a dc on this and following rnds)
23 dc in ring; join in 3rd ch of beg ch-3: 24 dc.
Rnd 2: Ch 4 (counts as a dc and a ch-1 sp), *dc in next dc,
ch 1; rep from * 22 times more; join in 3rd ch of beg ch-4.
Rnd 3: Ch 5 (counts as a dc and a ch-2 sp), * dc in next dc,
ch2; rep from * around; join in 3rd ch of beg ch-5.
Rnd 4: Ch 6 (counts as a dc and a ch-3 lp on this and following rnds), * dc in next dc,
ch 3; rep from * around; join in 3rd ch of beg ch-6
Rnd 5: Ch 6, * sc in next dc; ch 4 sl st in sc just made: picot
made; ch 3, dc in next dc, ch3; rep from * 11 times more,
ending last rep without working last dc and last ch3; join
in 3rd ch of beg ch-6
Rnd 6: Ch 12 (counts as a dc and a ch-9 lp), * dc in next dc,
ch 9; rep from * 10 times more; join in 3rd ch of beg ch-12.
Rnd 7: Ch 8 (counts as a dc and a ch-5 lp), * sk next 4 chs
of next ch-9 lp, dc in next ch, ch 5, dc in next dc, ch 5; rep f
rom* 11 times more, ending last rep without working last
dc and last ch 5; join in 3rd ch of beg ch-8.
Rnd 8: Ch 6, * sc in next ch-5 lp, picot; ch 3, dc in next dc,
ch 3; rep from * 23 times more, ending last rep without
working last dc and last ch 3; join in 3rd ch of beg ch-6
Rnd 9: Ch 10 (counts as a dc and a ch-7 lp), * dc in next dc
ch 7; rep from * 22 times more; join in 3rd ch of beg ch-10.
Rnd 10: ch 11 (counts as a dc and a ch-8 lp), * dc in next
dc, , ch 8; rep from 2 22 times more; join in 3rd ch of beg ch-11.
Rnd 11: Sl st in next ch-8 lp; ch 3, 9 dc in same lp; * dc in next
dc, , 10 dc in next ch-8 lp; ch 2, 10 dc in next ch-8 lp; rep
from *11 times more, ending last rep withoug working last
10 dc; join in 3rd ch of beg ch-3.
Rnd 12: Ch 3, dc in cext 4 dc, * ch 4, sk next 5 dc, in next
dc work (dc, ch 2, dc): V-st made; ch 4 sk next 5 dc, dc in
next 5 dc, ch 2, dc in next 5 dc; rep from * 11 times more,
ending last rep without working last 5 dc; join in 3rd ch of
beg ch-3.
Rnd 13: Ch 3, dc in next 4 dc, * ch 4, sk next ch-4 lp, in
next ch-2 sp of next V-st work V-st: V-st in V-st made; ch 4
sk next ch-4 lp, dc in next 5 dc, ch 3, dc in next 5 dc; rep
from * 11 times more, ending last rep without working last
5 dc; joinin 3rd ch of beg ch-3.
Rnd 14: Ch 3, dc in next 4 dc, * ch 4, sk next ch-4 lp, V-st
in next V-st; ch 4, sk next ch-4 lp, dc in next 5 dc, ch 5 dc
in next 5 dc; rep from * 11 times more, ending last rep
without working last 5 dc; join in 3rd ch of beg ch-3.
Rnd 15: Ch 3, dc in next 4 dc, * ch 3, sk next ch-4 lp, V-st
in next V-st; ch 3, sk next ch-4 lp, dc in next 5 dc, ch 7, dc
in next 5 dc; rep from * 11 times more, ending last rep
without working last 5 dc; join in 3rd ch of beg ch-3.
Rnd 16: Ch 3, dc in next 4 dc, * ch 2, sk next ch-3 lp, V-st
in next V-st; ch 2, sk next ch-3 lp, dc in next 5 dc, ch 5, CL
(see pattern stitches) in next ch-7 lp; ch 5, dc in next
5 dc; re from * 11 times more, ending last rep without
working last 5 dc; join in 3rd ch of beg ch-3.
Rnd 17: Ch 3, dc in next 4 dc, * ch 1, sk next ch-2 sp, V-st
in next V-st; ch 1, sk next ch-2 sp, dc in next 5 dc, ch 5, CL
in next ch-5 lp; ch 3, CL in next ch-5 lp; ch 5, dc in next 5
dc; rep from * 11 times more, ending last rep without
working last 5 dc; join in 3rd ch of beg ch-3.
Rnd 18: Ch 3, dc in next 4 dc, * ch 3, sc in ch-2 sp of next
V-st, ch 3, dc in next 5 dc, ch 5, CL in next ch-5 lp; ch 3,
CL in next ch-3 lp; ch 3, CL in next ch-5 lp; ch 5, dc in next
5 dc; rep from * 11 times more, ending last rep without
working last 5 dc; join in 3rd ch of beg ch-3.
Rnd 19: Ch 3, dc in next 4 dc, * ch 2, dc in next 5 dc, ch3,
CL in next ch-5 lp; (ch 3, CL in next ch-3 lp) twice; ch 3, CL
in next ch-5 lp; ch 3, dc in next 5 dc; rep from * 11 times
more, ending last rep without working last 5 dc; join in 3rd
ch of beg ch-3.
Rnd 20: Ch 3, dc in next 4 dc, * sk next ch-2 sp, dc in next
5 dc, (ch 3, CL in next ch-3 lp) 5 times; ch 3, dc in next 5 dc;
rep from * 11 times more, ending last rep without working
last 5 dc; join in 3rd ch of beg ch-3.
Rnd 21: Ch 3 dc in next 2 dc, * (CL over next 2 dc) twice;
dc in next 3 dc, (ch 3, CL in next ch-3 lp) 6 times; ch 3 dc
in next 3 dc; rep from * 11 times more, ending last rep
without working last 3 dc; join in 3rd ch of beg ch-3.
Rnd 22: Ch 3, dc in next dc, * (CL over next 2 sts) twice; dc
in next 2 dc, (ch 3, CL in next ch-3 lp) 7 times; ch 3, dc in
next 2 dc; rep from * 11 times more, ending last rep without
working last 2 dc; join in 3rd ch of beg ch-3.
Rnd 23: Ch 3, * (CL over next 2 sts) twice; dc in next dc,
(ch 3, CL in next ch-3 lp) 8 times; ch 3, dc in next dc;
rep from * 11 times more, ending last rep without working
last dc; join in 3rd ch of beg ch-3.
Rnd 24: Beg 4-dc CL (see pattern stitches) over
next 3 sts; * (ch 3, CL in next ch-3lp) 9 times; ch 3, 4-dc CL
(see pattern stitches) over next 4 sts; rep from
* 11 times more, ending last rep without working last 4-dc
CL; join in top of beg 4-dc CL.
Rnd 25: Sl st in next 3 chs, in top of next CL, and in next
2 chs of next ch-3 lp; ch 1, sc in same lp; * (ch 5, sc in next
ch-3 lp) twice; ch 11, sk next 2 ch-3 lps, sc in next ch-3 lp;
rep from * 23 times more, ending last rep without working
last sc; join in first sc.
Rnd 26: Sl st in next 3 chs of nest ch-5 lp; ch 1, sc in same
lp; * ch 5, sc in next ch-5 lp, ch1, 11 dc in next ch-11 lp;
ch 1, sc in next ch-5 lp; rep from * 23 times more, ending last
rep without working last sc; join in first sc.
Rnd 27: Sl st in next 3 chs of next ch-5 lp; ch 1, sc in same
lp; picot; * (ch 3, sk next dc, dc in next dc, picot) 5 times;
ch 3, sc in next ch-5 lp, picot; rep from * 23 times more,
ending last rep without working last sc and last picot; join in
first sc.
Finish off and weave in ends.
After making this doily, I decided to use the pattern to make a dress. I used it especially to make the skirt of the dress; as you can see in the picture.
After using the doily pattern to start the skirt, the rest of the skirt is worked in a classic Shell Trellis pattern.
What inspired me to make this dress was the golden days of 1920. The silhouette is straight down, with the waist set low on the hipline. The top of this dress is simply worked on two rectangles, worked on Double Crochet and Puff Stitch.
The Puff stitch is made by working a yarn over your hook, insert hook into 1ch space, draw up a loop, repeat 5 times, yarn over, draw through 10 loops, yarn over, draw through remaining 2 loops on hook. 1 puff made.
The front of the dress is worked vertically and the back horizontally using a Double Crochet stitch., as you can see in the picture. I made it this way because I wanted a Puff stitch on the edges of the front rectangle . For that motive I worked the back horizonally; that way in the moment of sewing the front and back together, the stiches will match perfectly.
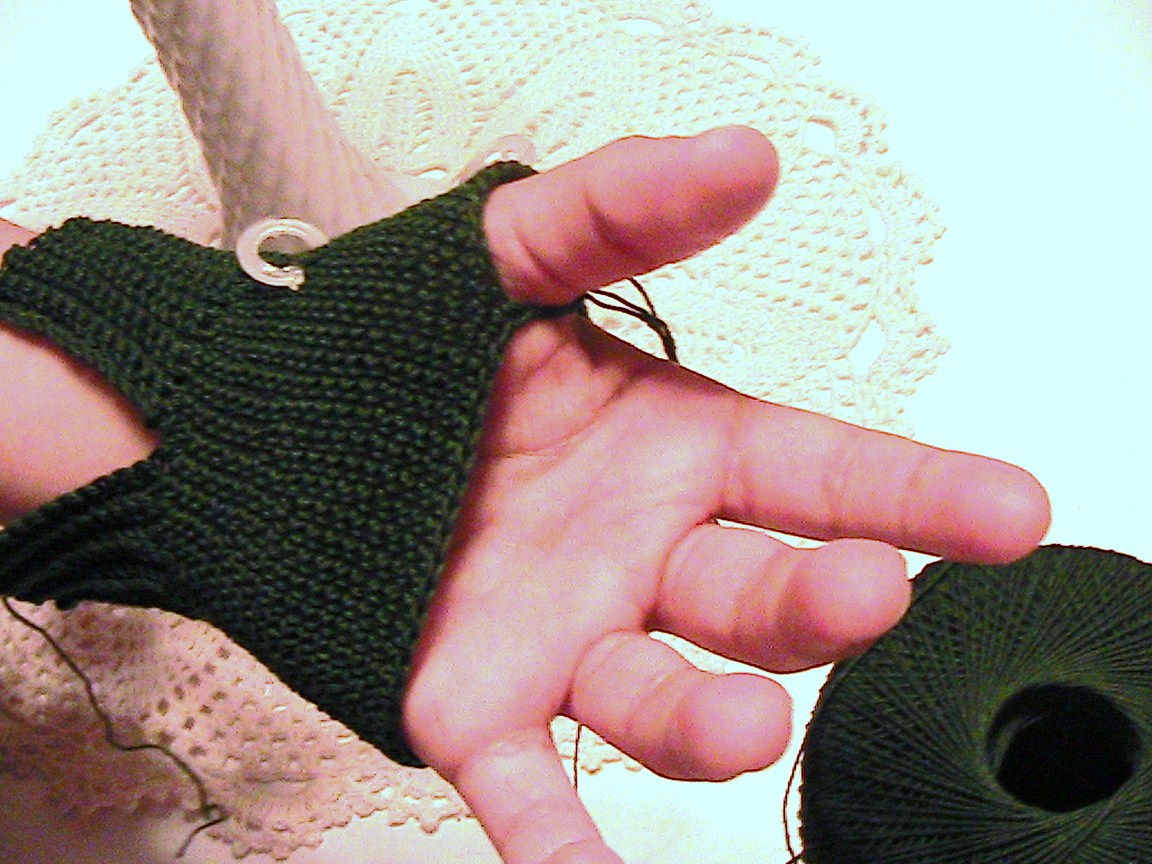
And this dress is not complete without a pair of matching gloves to complete the look.
~I want to wish you success in everything you do and have a wonderful day~